Elasticsearch Instance Spin Up
Deploy Elasticsearch on Vultr
Create a Vultr Instance
Sign in or sign up for an account in Vultr. Once logged in make sure you are under products1, click Network2, select VPC 2.03, and click “ADD VPC 2.0 Network”.4

Choose the Network Location of your choice. Make sure all the virtual machines you make match this location.
Under Configure IP Range select “Configure IPv4 Range”1 and manually set an IP range2. Give the network a name3, and click Add Network.4

Now the VPC cloud network is complete.
Create Elasticsearch VM
In the top left corner click “Deploy” and select Deploy New Server.1

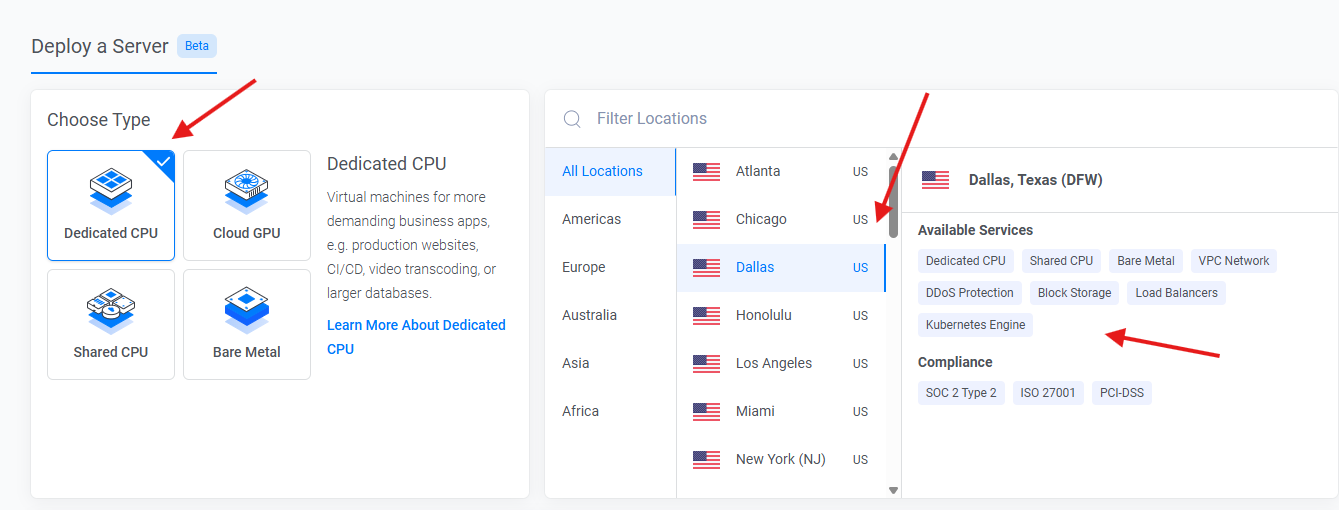
Leave default choice as Dedicated CPU1 and choose the same location as the VPC network2
*Something I thought was cool, notice the Available Services and Compliance that different locations have.
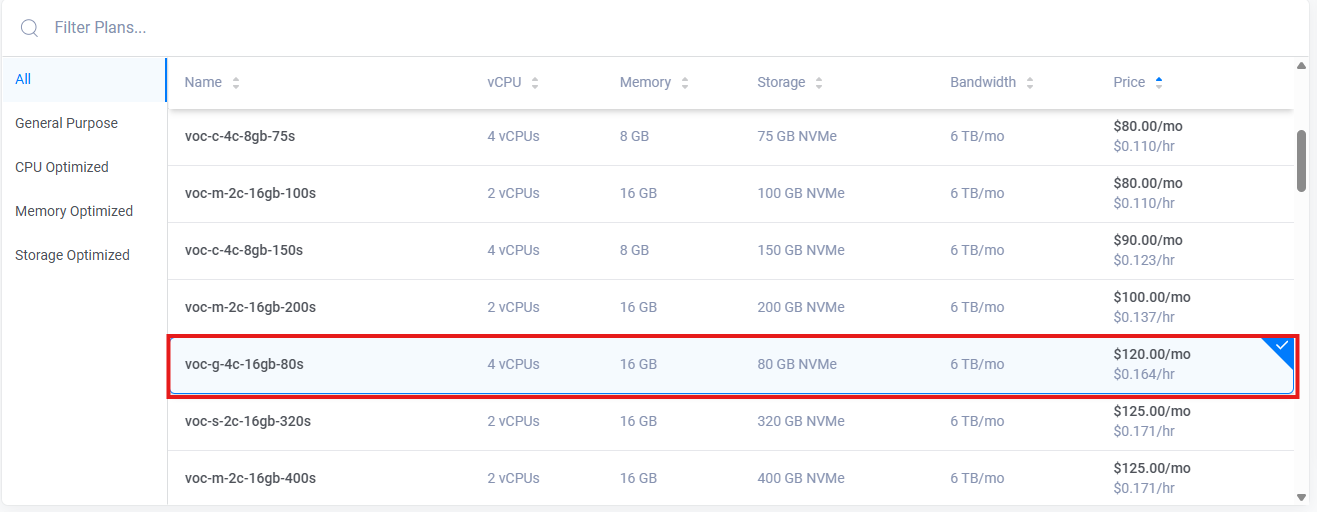
For this lab I chose 4 vCPUs, 16 GB RAM, and 80 GB of storage.
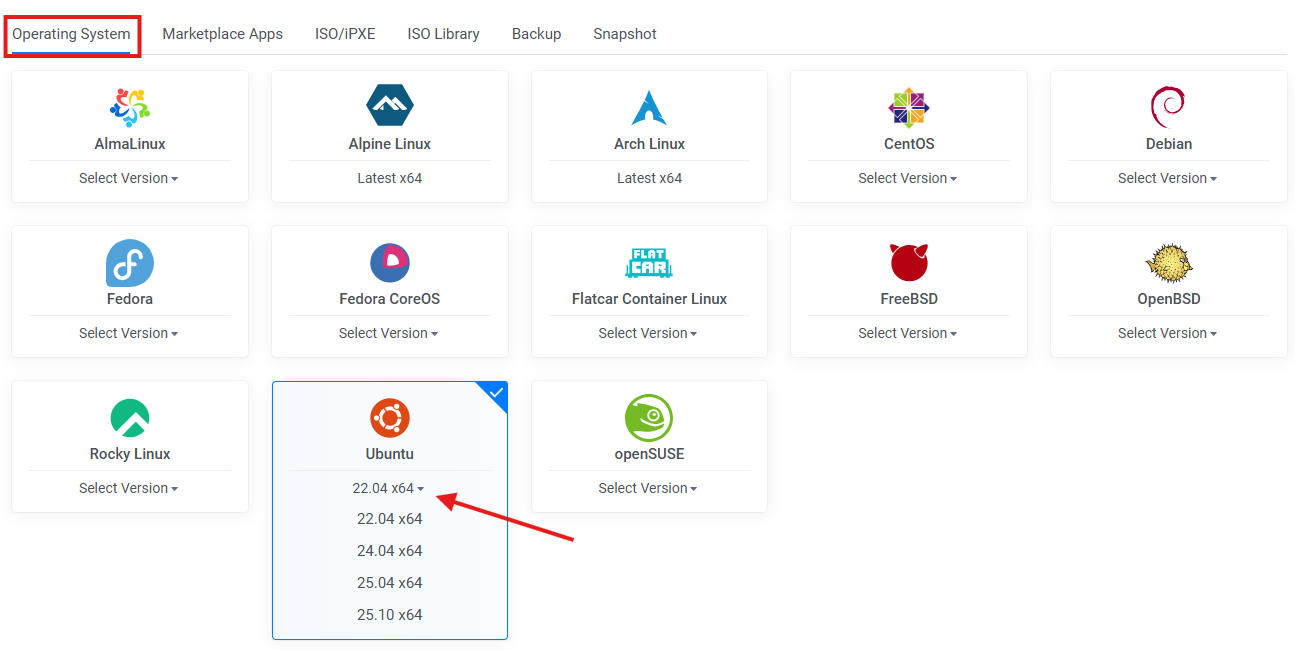
Move to the next page and under Operating System select Ubuntu and for this lab I selected version 22.04 x641
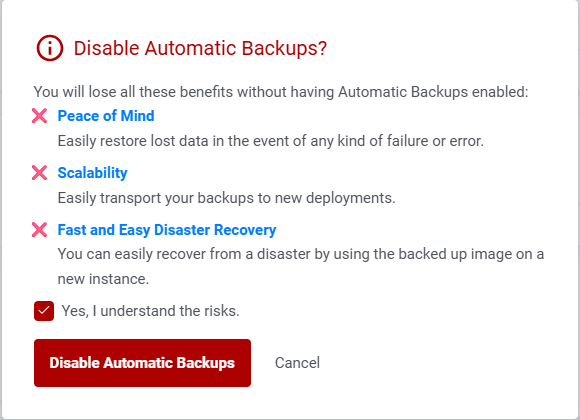
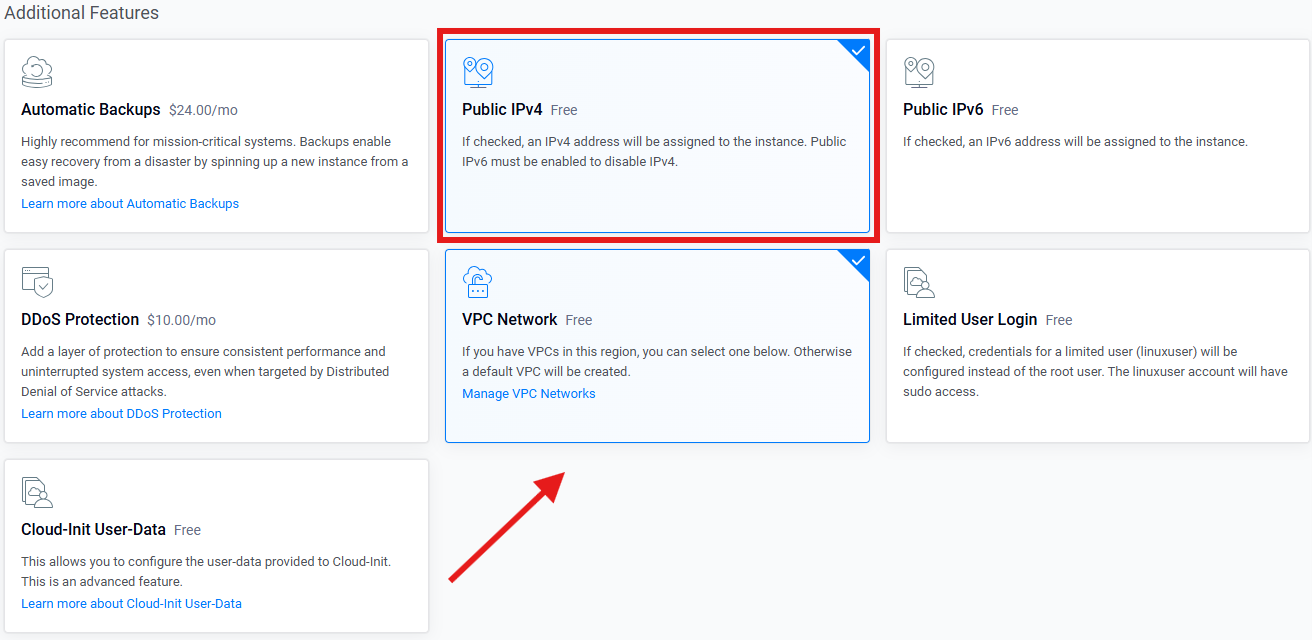
Click to disable Auto Backups.
IPv4 will be automatically checked. Select VPC Network.1
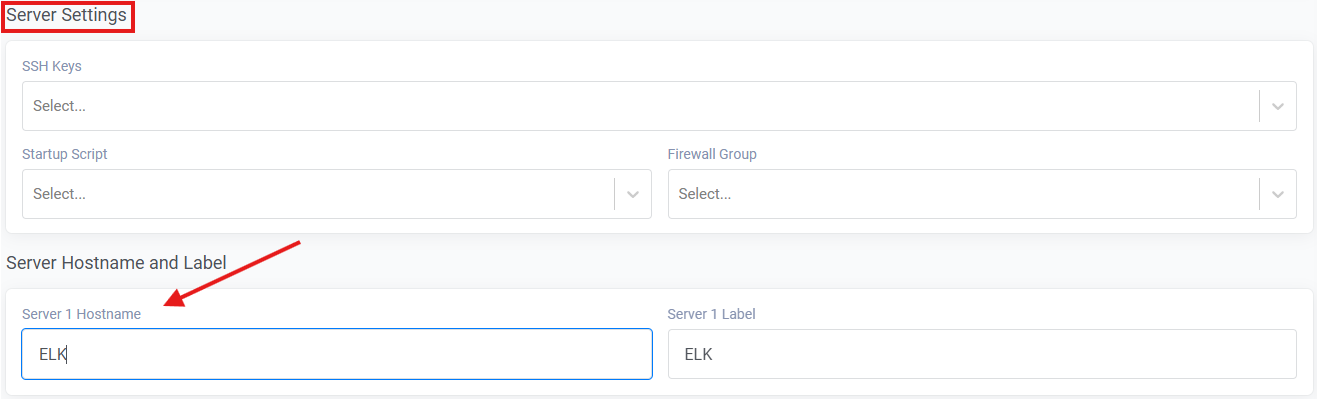
Under Server Settings give the Server 1 Host a name1 and leave everything else default.
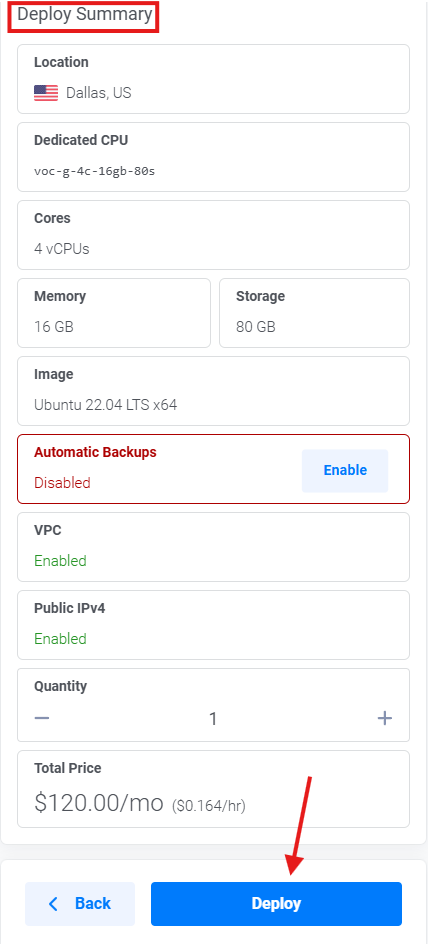
Check over the Summary, make sure everything is correct and hit Deploy.1
*Note the hourly price. This whole lab can be done for less than 50 cents if ran for a few hours.
Once Status says “Running”1, click on your server name “ELK”.2

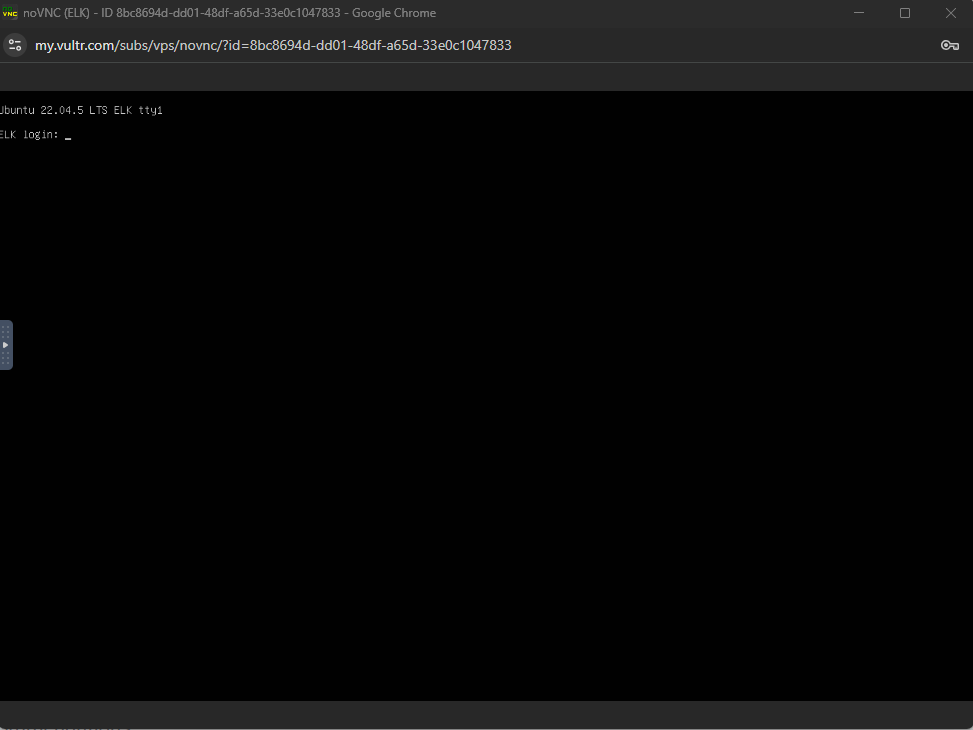
While the server installs and boots up, you can view the console.1
*Keep note of the username and IP address.2 (Your IP address will be different than mine)
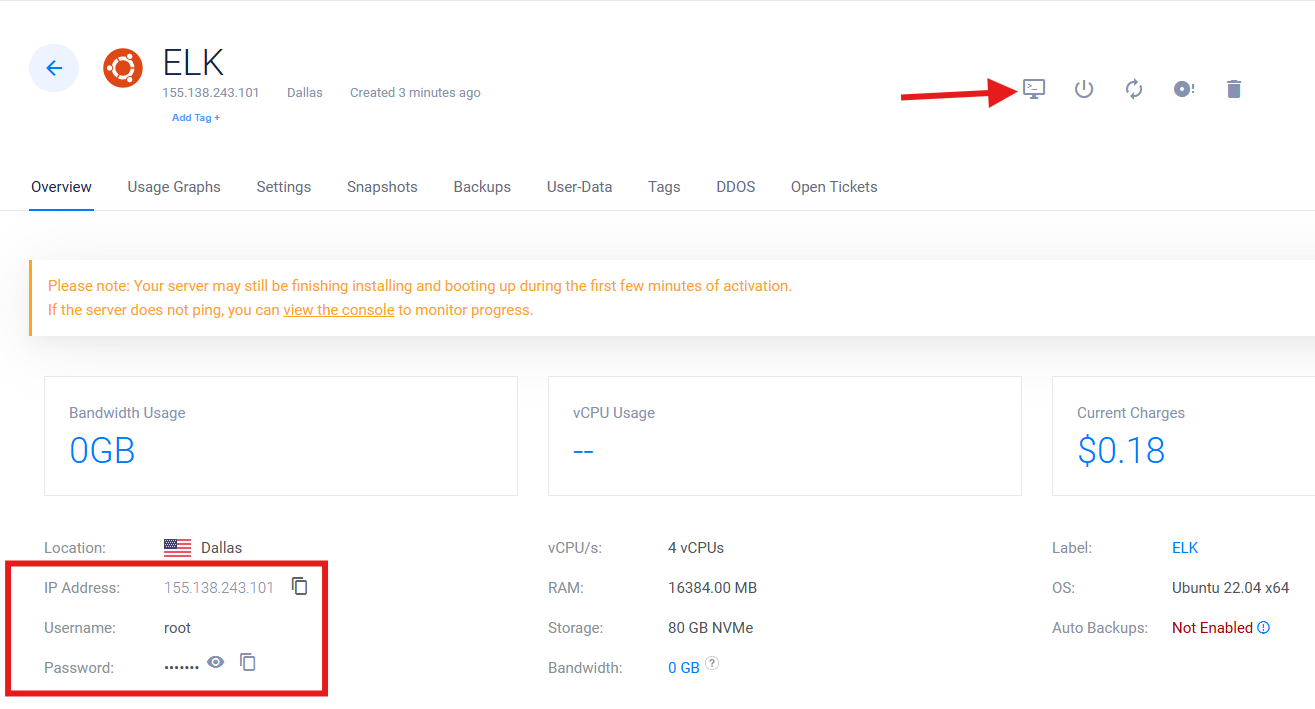
Server is ready to go once prompted to login.
Instead of working through the console another way to interact with the VM is to SSH into it. *I used my student Windows VM that I got from SANS. It wouldn’t allow screenshots. These are the powershell commands to run next.
ssh root@155.138.243.101
#Use IP from dashboard
#Enter Password from dashboard
apt-get update && apt-get upgrade -y
#Updating the repositories
#Hit enter when you see a window pop up
Install Elasticsearch
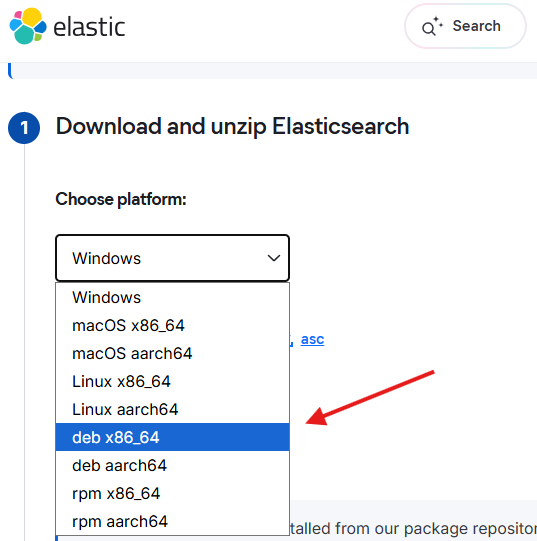
Time to install Elasticsearch. Go to (https://www.elastic.co/downloads/elasticsearch) For platform choose “deb x86_641
Once selected hover over the blue button and right-click and select “Copy link address”.
Go back to powershell and follow these commands.
wget https://artifacts.elastic.co/downloads/elasticsearch/elasticsearch-9.1.5-amd64.deb
#Once downloaded run
ls
#You should see the debian file listed - elasticsearch-9.1.5-amd64.deb
#Keep in mind you may have a different elasticsearch version number
dpkg -i elasticsearch-9.1.5-amd64.deb
#To install Elasticsearch
###Once finished, look under the “Security autoconfiguration information”. This shows your password for your superuser and additonal information on password reset. Go ahead and highlight everything under the title and save it in whatever text editor you’d like just in case you may need it. For me I saved it in notepad.###
cd /etc/elasticsearch
ls
#This is where the configuration file is for your elastic search vm. It is a YAML file
nano elasticsearch.yml
Now there are a couple things that need to be changed. First find “#network.host: 192.168.0.1” by hitting the down arrow button.
This will allow your Elasticsearch instance to be accessible via your SOC analyst laptop (laptop you use to SSH).
Change the network host by 1. Removing the comment “#” 2. Change the default IP address to your laptops IP address.
Hit the down arrow and remove the comment “#” in front of “#http.port: 9200”
Hit “Ctrl + X” save then “Ctrl + Y” and enter
Configure Firewall Settings
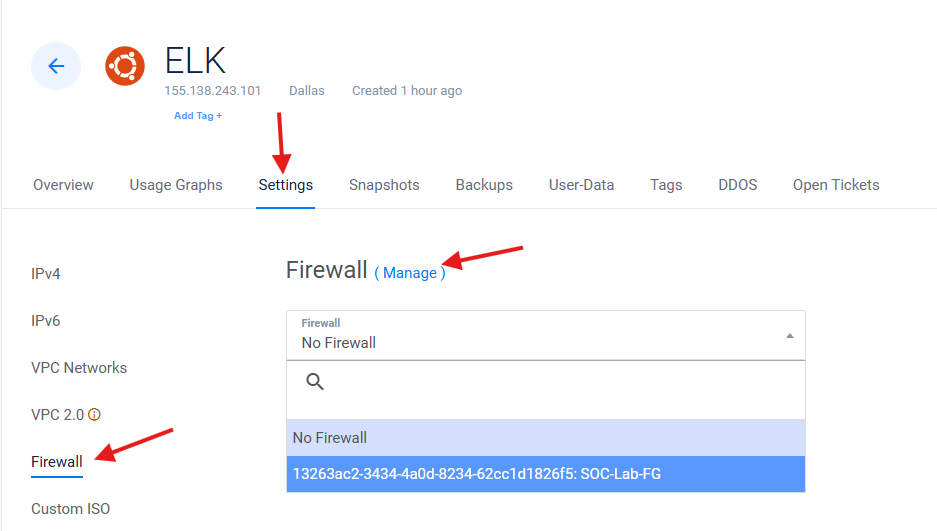
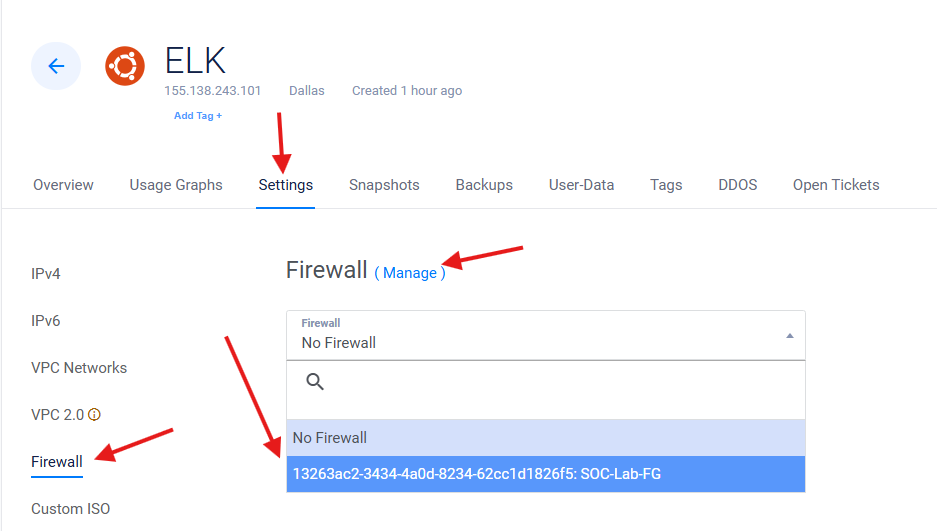
In the Elk Server dashboard click Settings,1 Firewall2, and Manage.3
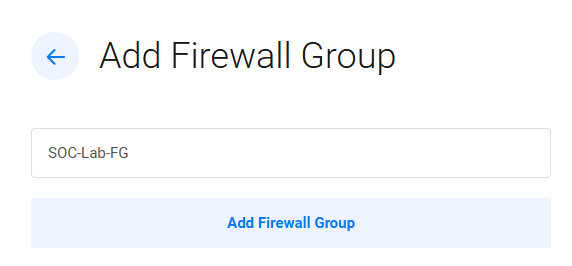
In the top right corner cick “Add Firewall Group.
Name your Firewall Group and click Add Firewall Group.
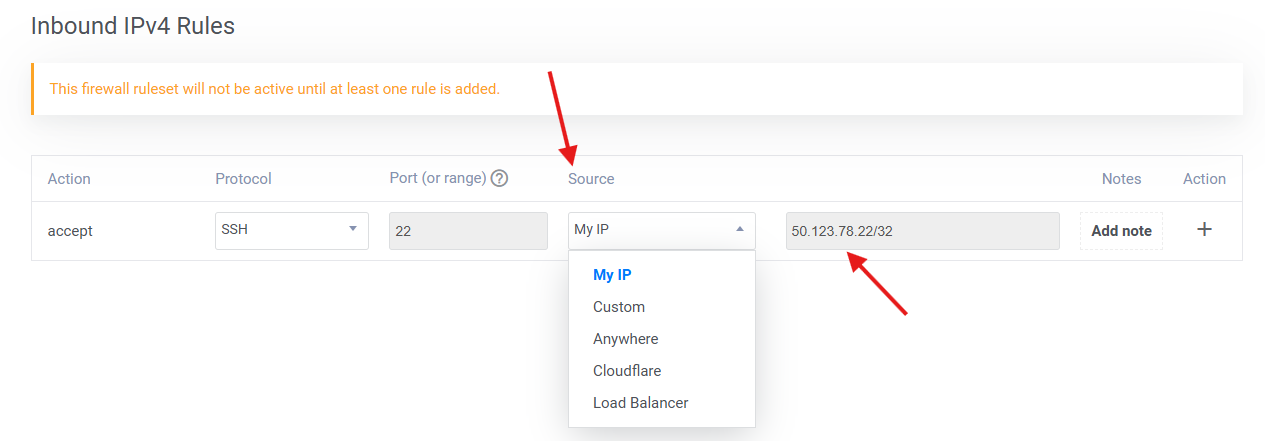
By default it has an SSH rule that allows anywhere from the internet to access the VM. For security lock it down to just the IP address you used to SSH into the server. Under Source select “My IP”1 and add your IP address.2
In the top left corner click Compute, and select the VM “ELK”. Now In the Elk Server dashboard click Settings,1 Firewall2, Manage,3 and select the Firewall Group just created,4 and hit Update Firewall Group.
Fire up Elasticsearch
Head back over to powershell and start up the Elasticsearch instance.
systemctl daemon-reload
systemctl enable elasticsearch.service
systemctl start elasticsearch.service
systemctl status elasticsearch.service
#Check that status says “Running”
Congrats Elasticsearch is spun up.