Security Onion Home Lab Part 1
Security Onion 2.4 Overview
What is Security Onion
According to Security Onion Soluitons:
"Security Onion is a free and open platform built by defenders for defenders. It includes network visibility, host visibility, intrusion detection honeypots, log management, and case management."
Tech Stack used in Security Onion
Network Visability
- Suricata – Signature based NIDS, packet capture, & metadata and file extraction, & file analysis
- Zeek – Network metadata collection & file analysis
- Stenographer – Full packet capture
- OpenCanary - Intrustion Detection Honeypot
Host Visability
- Elastic Agent - Endpoint visability & data collection
- OsQuery - Live queries embedded in Elastic Agent
- Elastic Fleet - Centralized management
Security Onion Console (SOC)
- Elastic Stack - Elasticsearch used for data storage, Logstash used to ingest, parse and process logs, and Kibana used for visualization. SOC is a customized user interface for alerting, hunting, dashboards and more.
Additional Tools
- Strelka - File analysis
- Redis - Message broker (log buffer)
- Sigma - Detection rule format
- Wireshark - Packet analysis
- CyberChef - Data decoding utility
- Att&ck Navigator - Advesary mapping framework
By no means is this the full list of technologies used but with this you can get a pretty good idea of the capabilities of Security Onion.
Security Onion Installation
Go to (https://securityonionsolutions.com/software/) and click download.
It will bring you to this Github repo. Download the ISO file.
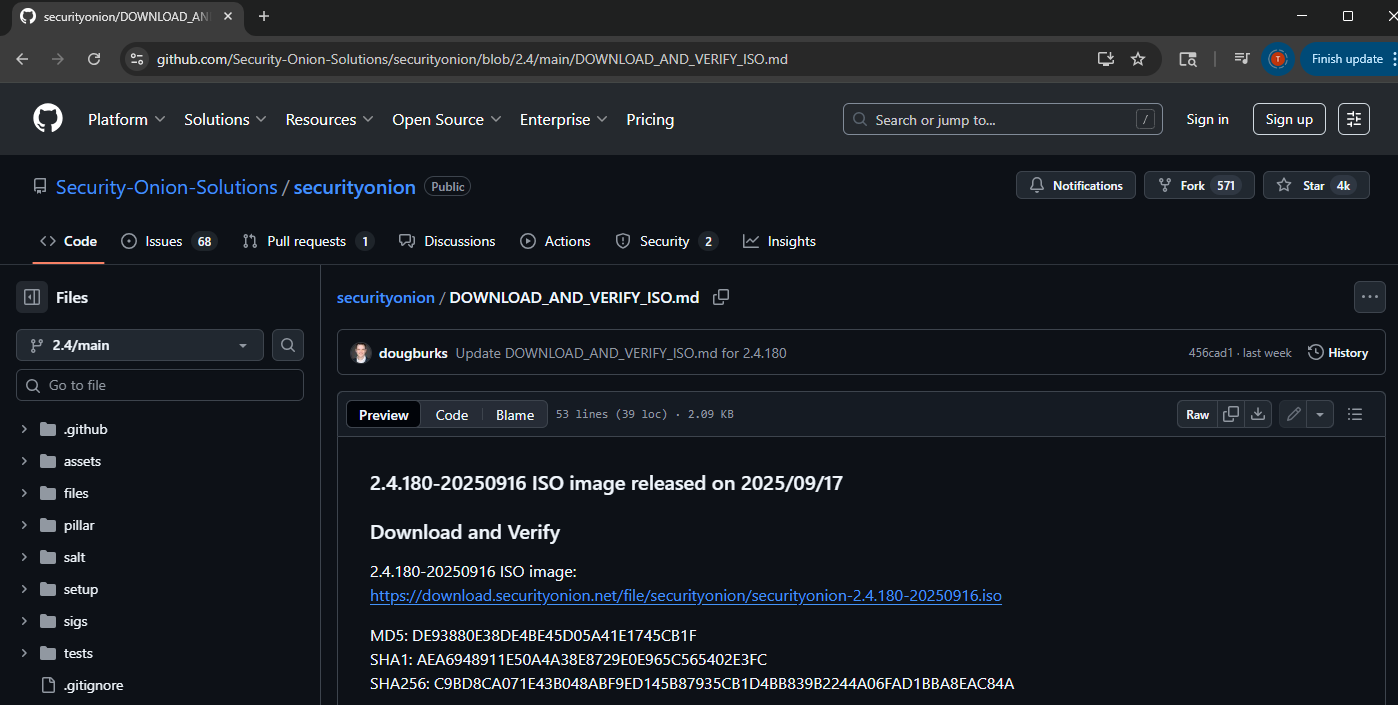
Optional but highly recommended. Verify the hashes are the same using “Certutil”

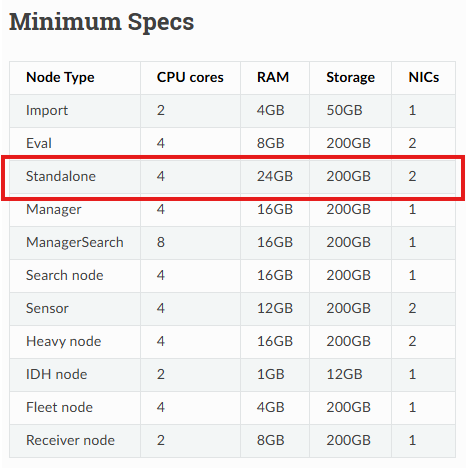
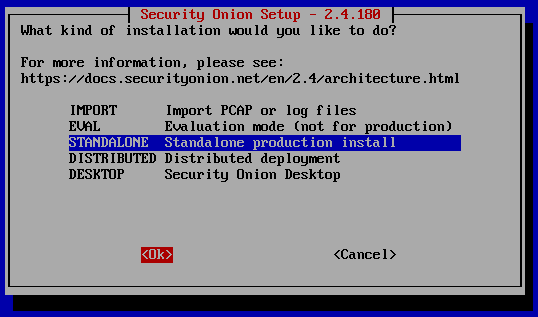
Before beginning you can go to (https://docs.securityonion.net/en/2.4/hardware.html) and check out the mimimum hardware requirements to run this lab. For this lab I chose the Standalone architecture.
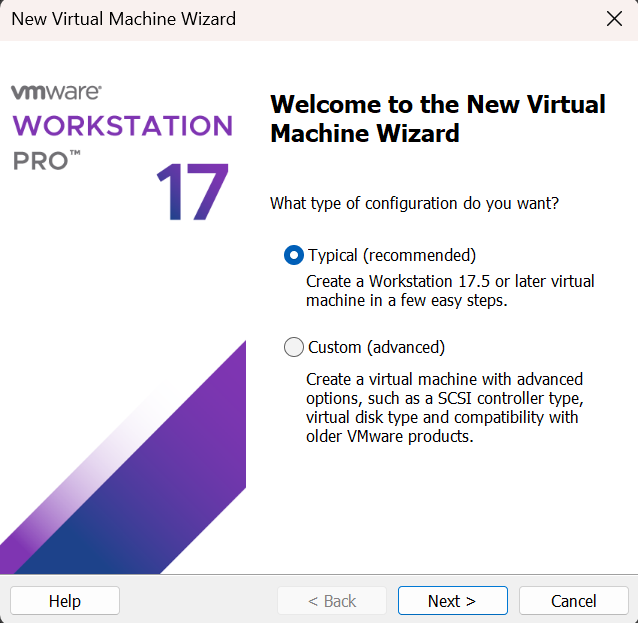
Now open VMware Workstation and click Create a New Virtual Machine.
The pop up wizard will come up. Keep the default configuration.
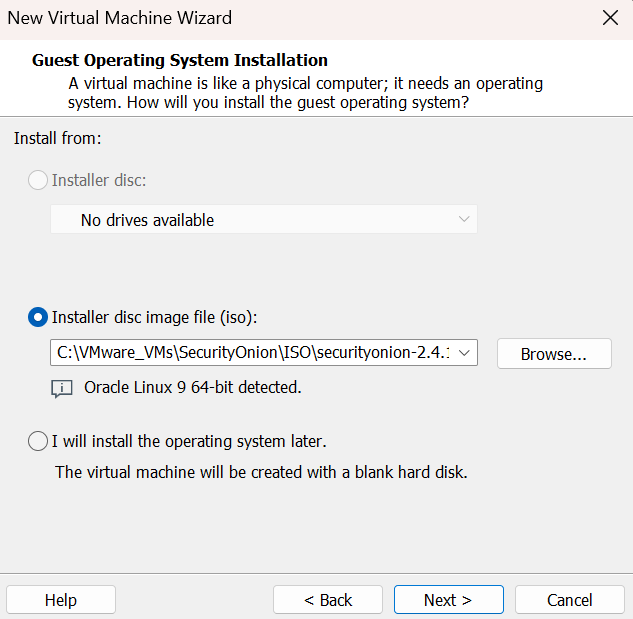
Select “Installer disc image file” and browse to the ISO file you just downloaded. *I created a separate folder for my ISO. You may do that or just use your downloads folder. For example, C:\Users\username\Downloads\
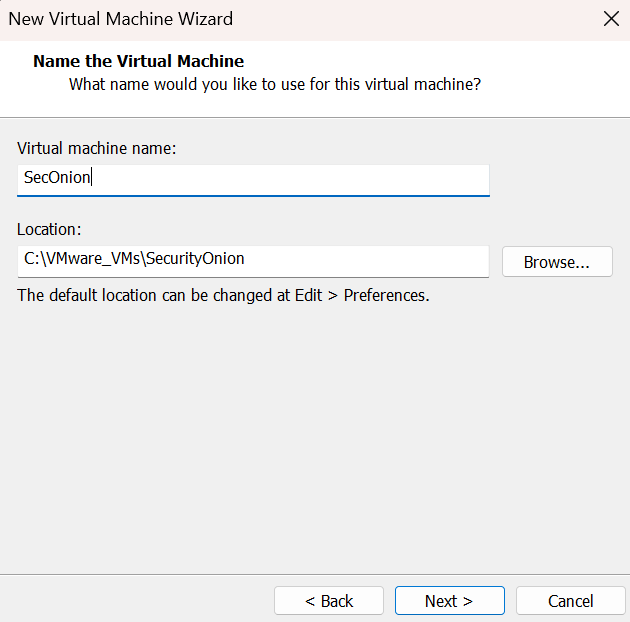
Name your virtual machine and choose the location you want to save it at.
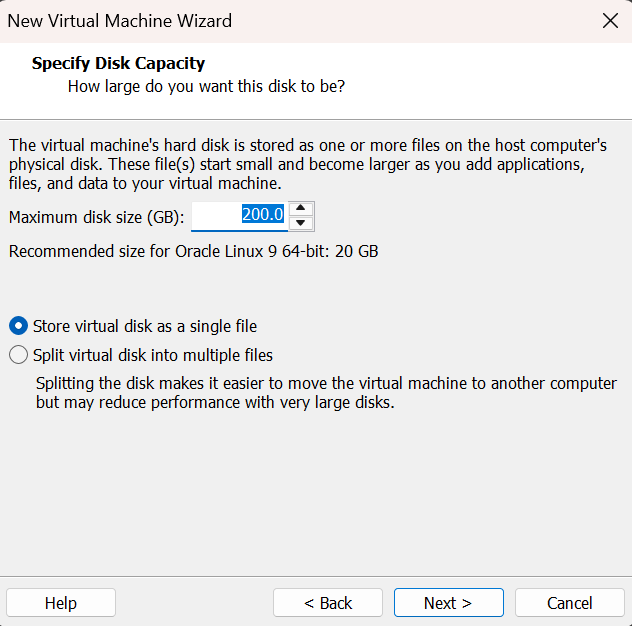
Put 200 GB for disk size (See Minimum Specs chart) and select “Store virtual disk as a single file”.
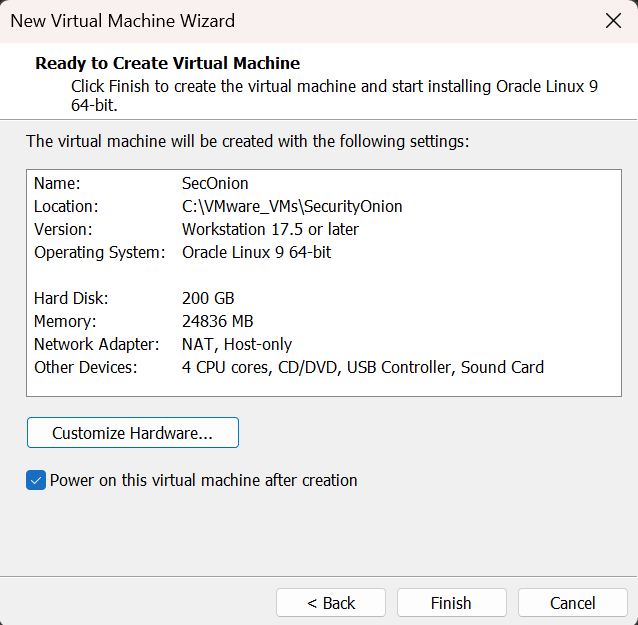
Before finishing the installation, click on “Customize Hardware”.
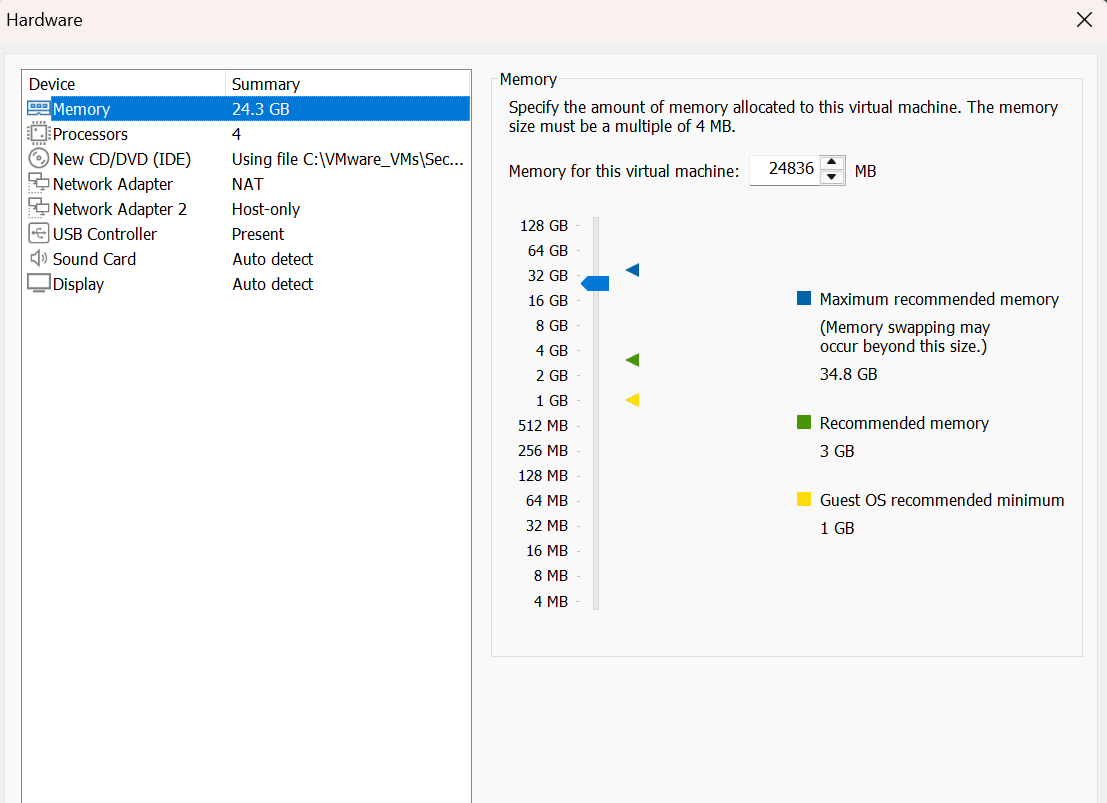
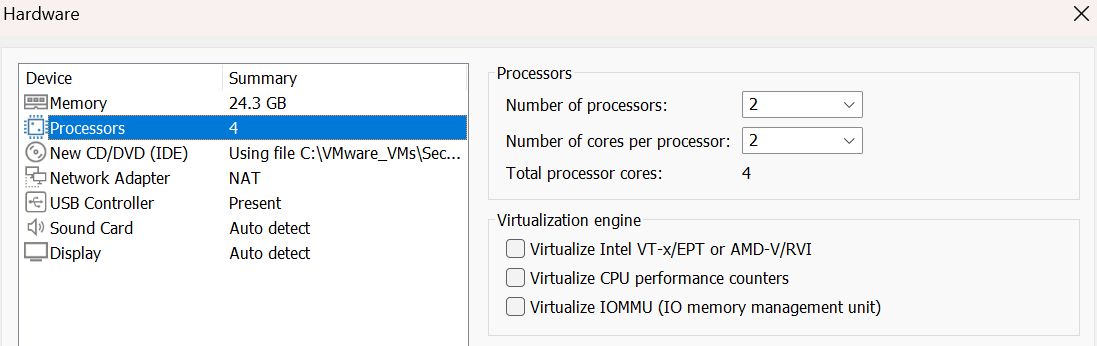
Select Memory and choose 24 GB or more.
Select Processors and change “Number of cores per processor” to 2. You should now have a total of 4 CPU cores.
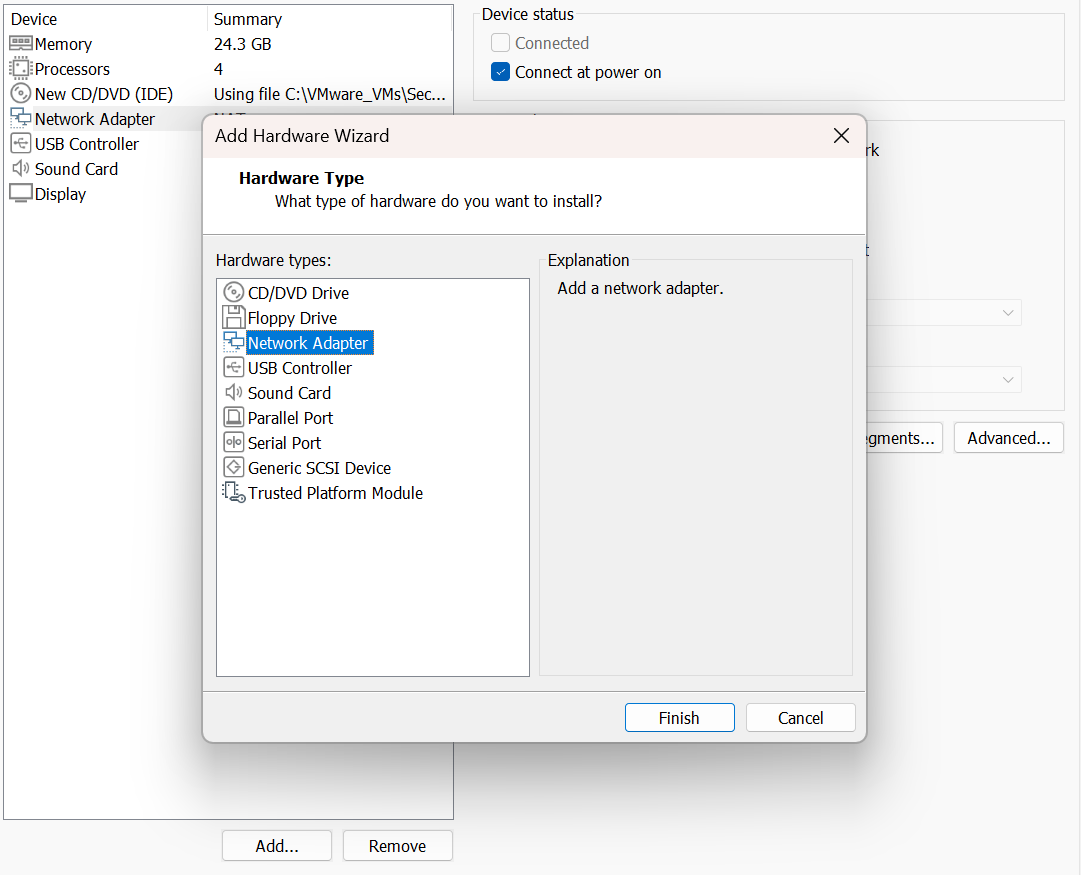
Now we need to have two NICs (Network Interface Card). The first one needs to be connected to NAT so that we can connect and communicate with Security Onion from our other machine. This will be for security management purposes. The second NIC will be for logs and monitoring purposes.
Select Network Adapter and click on Add down at the bottom. Select Network Adapter and Finish.
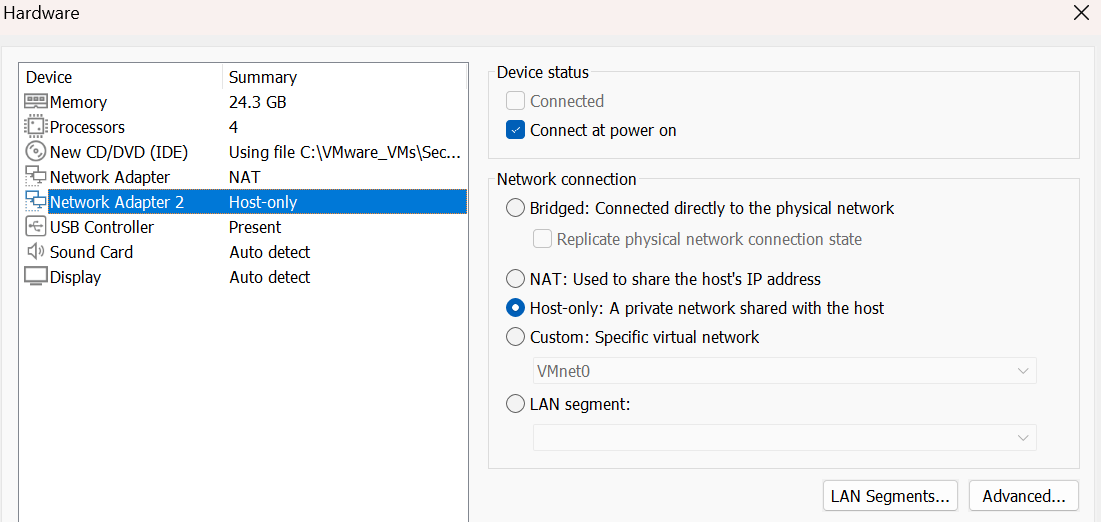
Select the second Network Adapter and change to Host-only.
Close the hardware window and select Finish.
Security Onion Configuration
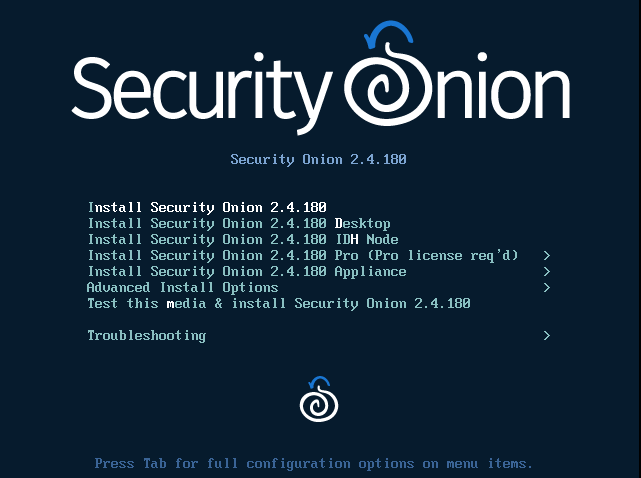
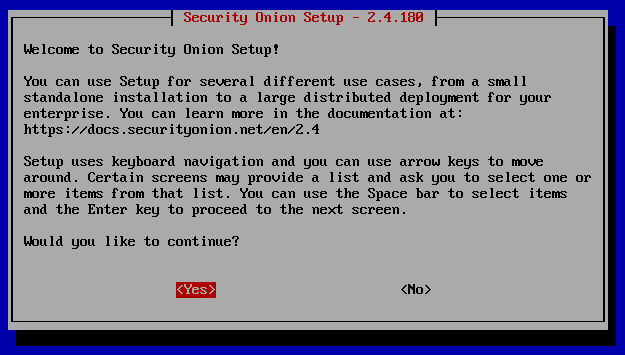
From this point on your mouse will be disabled. Use the Up and Down arrow key to highlight your selection and hit Enter to select it. Tab key allows you to move between different sections on the screen.
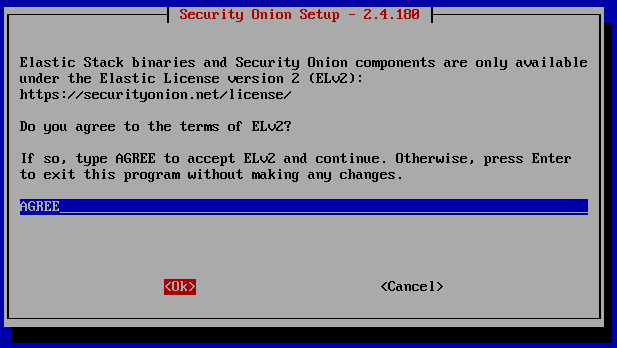
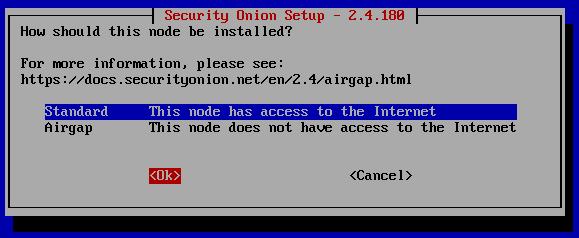
*A couple things to note. On the boot menu I want to highlight three of these options. First is the standard install shown at the top. This will be the option we choose to access the console (SOC). The second option I want to highlight is the IDH Node. This option installs a honeypot node that reports to the central manager. It can only be used in distributed deployments for enterprises. The last option I want to highlight is Pro. I’m using this option in my SANS lab coursework and it’s awesome! By default Security Onion comes with whats called Emerging Threats (ET), which is a set of intrusion detection rules. In the free open source version it’s called ETOPEN and is community driven, meaning contributions come from the security community. With the paid license, called ETPRO, these rulesets offer more advanced threat detection capabilities, guaranteed message delivery, use of compliance tools (STIG), fewer false positives, and much more.
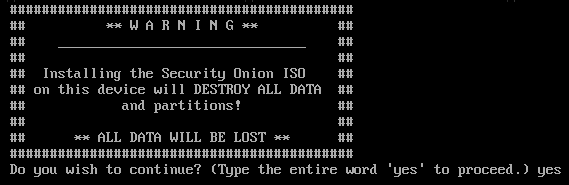
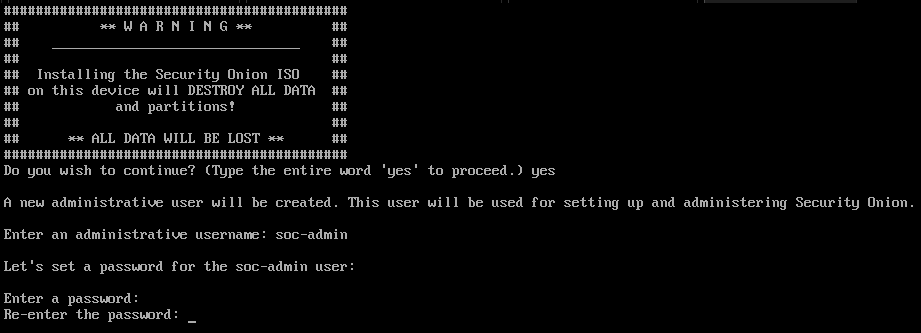
Now Security Onion will download everything it needs. This may take a bit. Once done you will see the Warning banner below, type the entire word ‘yes’ and hit enter.
Create an admin username, hit enter. Create a password, hit enter. *Remember in Linux systems the terminal doesn’t show your password. Re-enter the password again, hit enter.
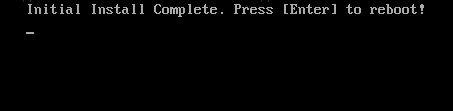
This downloading process is going to take a while. Once complete you will need to reboot.
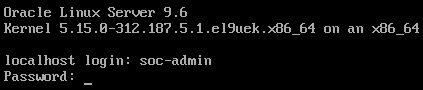
Once reboot is complete you may sign in using your credentials.
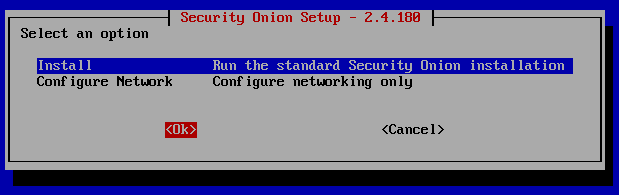
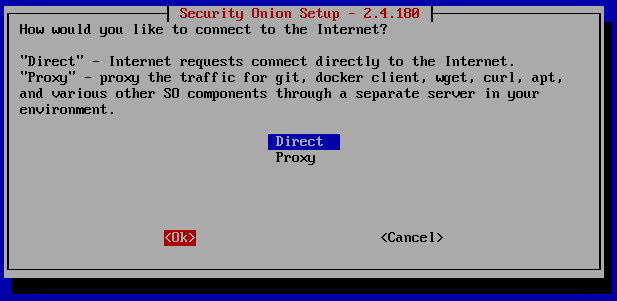
Follow the screenshots below. The blue highlight is the option to choose. Use tab to move from the highlighted option to ‘YES’, ‘NO’, ‘Ok’ or ‘Cancel’. Once blue is on the correct option, hit tab, and once either ‘YES’ or ‘OK’ is highlighted red hit Enter.
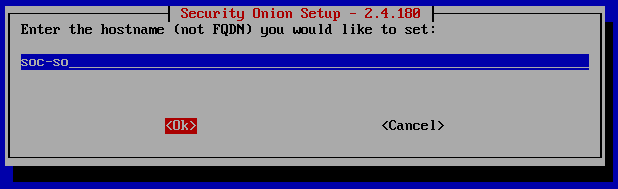
Create a hostname.
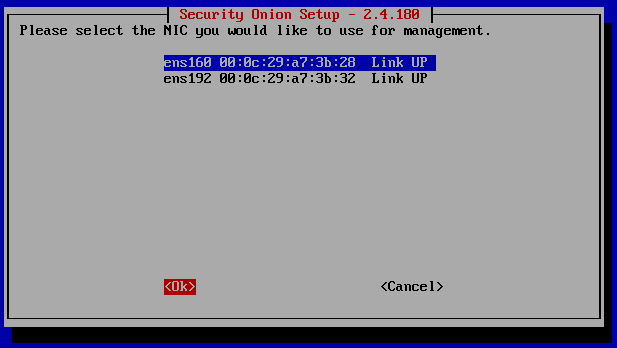
The blue highlighted ‘ens160’ is the network adapter using NAT. The other option ‘ens192’ is the Host-Only NIC.
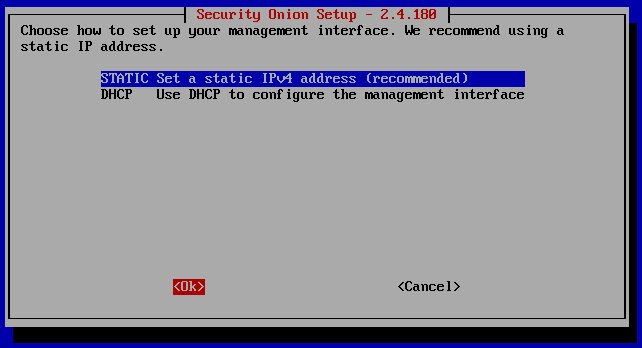
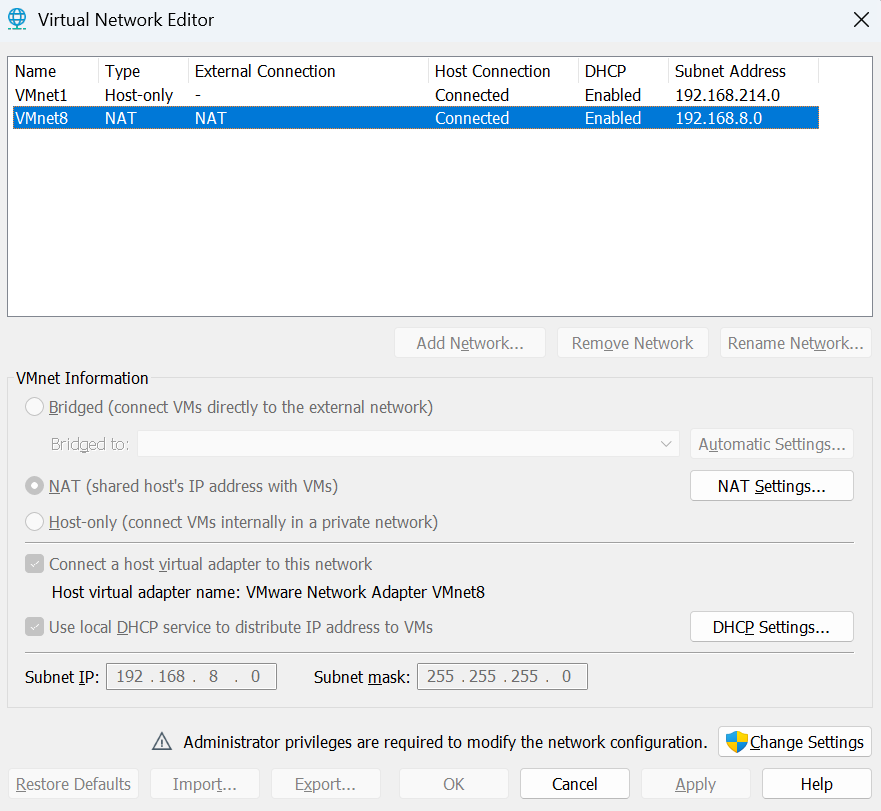
Here we are going to assign the IP range manually. If you don’t know the subnet address to connect to, in the menu bar of VMware Workstation go to ‘Edit’, and click ‘Virtual Network Editor’.
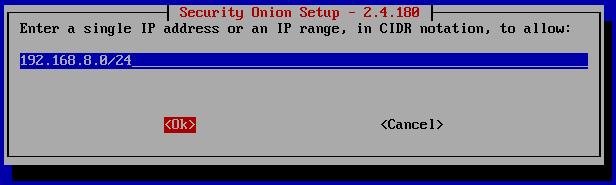
The editors interface shows two virtual networks. The IP address we want is VMnet8 NAT, select it. You will see down at the bottom the ‘Subnet IP’ and ‘Subnet mask’. The IP range we need to manually add in the Security Onion VM needs to be the same first 3 octets as the ‘Subnet IP’. My ‘Subnet IP’ was 192.168.8.0/24. The /24 comes from the ‘Subnet mask’.
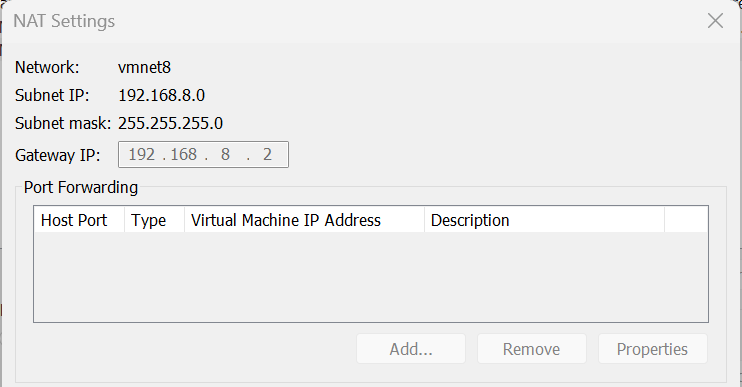
Next click ‘NAT Settings in the middle right. Here you will the ‘Subnet IP’, ‘Subnet mask’, and ‘Gateway IP’ - the routers IP that allows the Security Onion VM to connect to the internet. Write this down, you will need it.
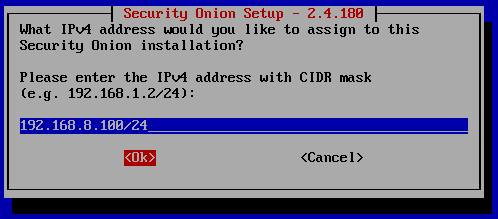
The IPv4 address with CIDR mask I assigned to Security Onion was 192.168.8.100/24.
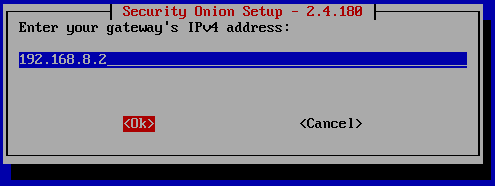
Next enter the ‘Gateway IP’.
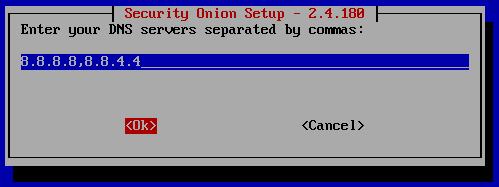
For the DNS server keep this default, this is Google’s DNS.
And again keep the domain default.

Continue to follow the screenshots.

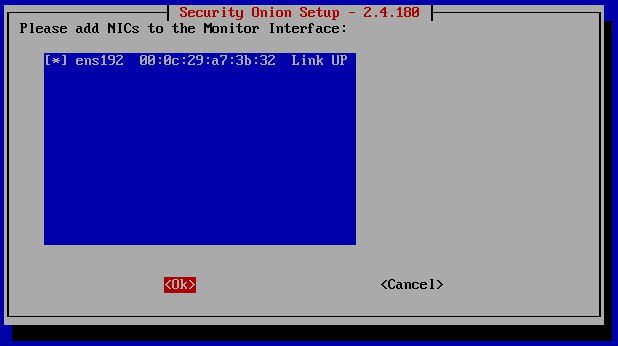
Here you will need to hit the space bar to select ‘ens192’, and a ‘*’ should appear. Remember this is the Host-Only NIC that is used for logs and monitoring. Hit tab to to select ‘Ok’.
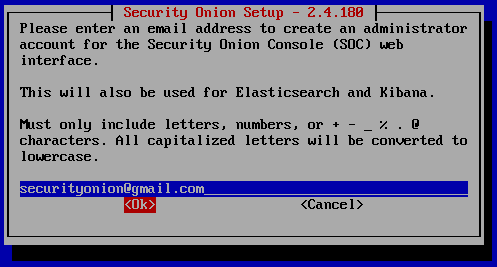
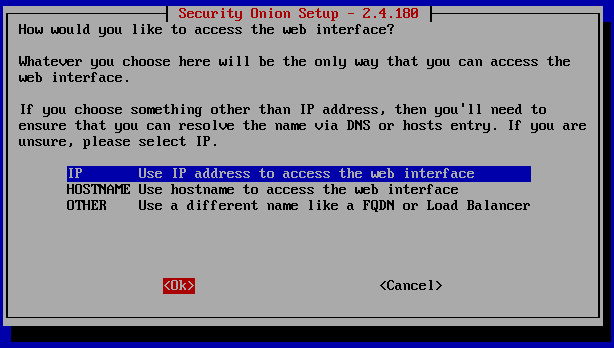
Now you can enter any email address you like, it doesn’t need to be a real one. You can make it up like I did. This will allow you to sign into the SOC interface.
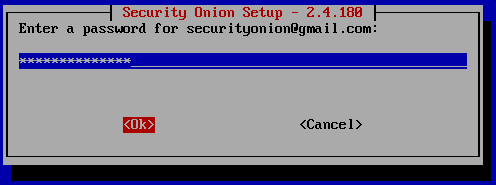
Create a password for the email address just created.
Follow screenshots.

Enter the same IP address as the ‘Subnet IP’. Make sure to add the ‘Subnet mask’ in CIDR notation /24.
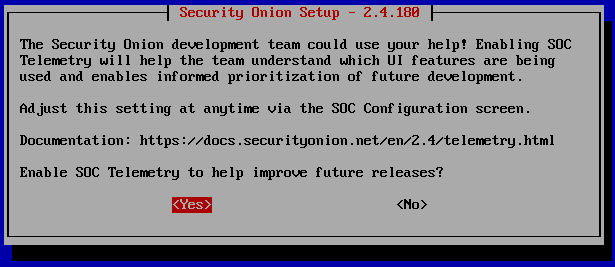
It’s up to you on which to select, ‘Yes’ or “No’. This is a lab environment so it doesn’t matter.
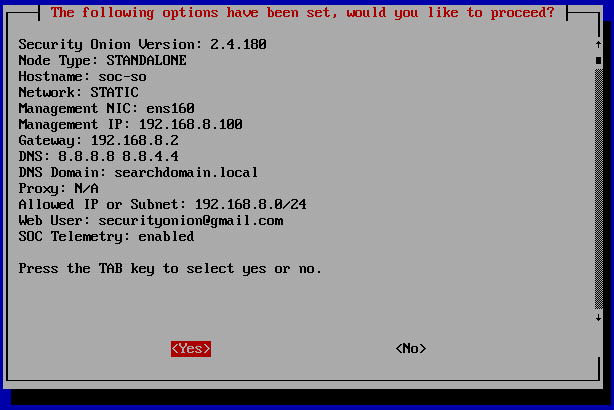
This is the summary of the configurations we just made. Tab to ‘Yes’ and hit Enter.
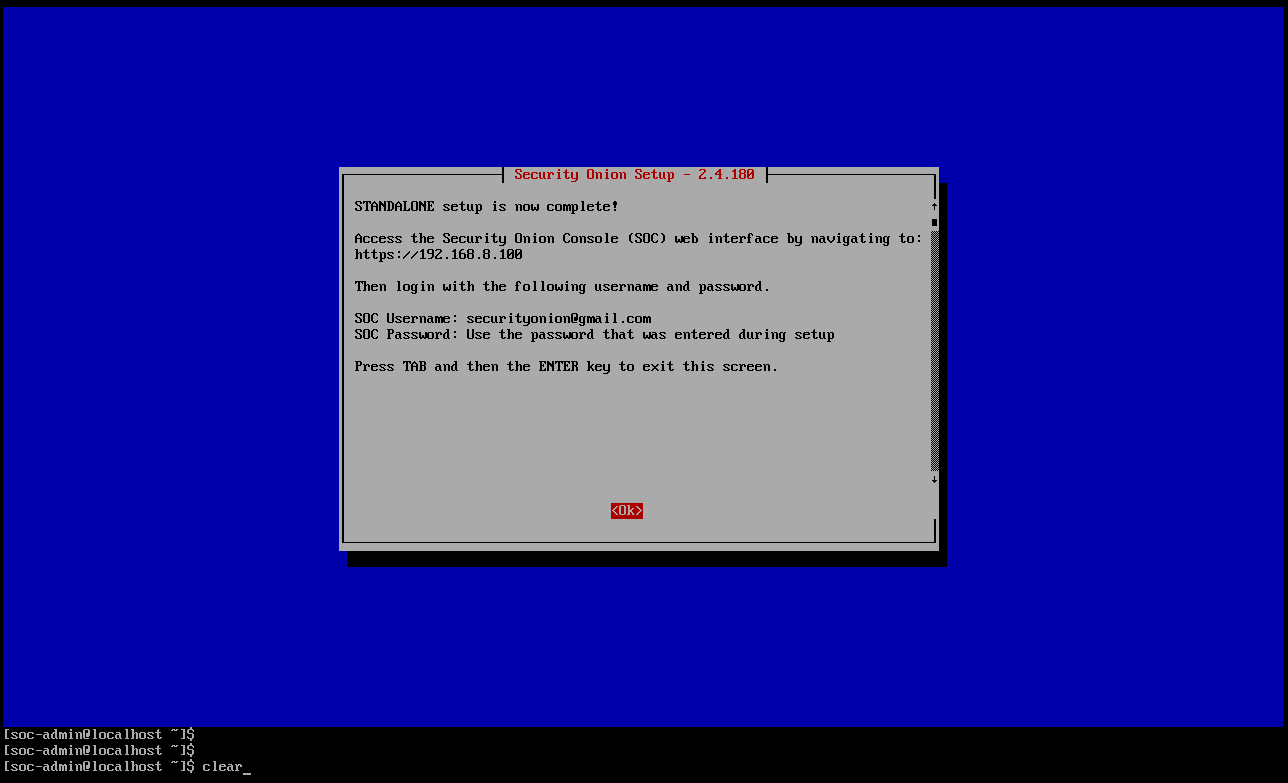
Now it will start to reboot and apply the configuration. Again this will take a while.
Once complete, tab to ‘Ok” and hit Enter.
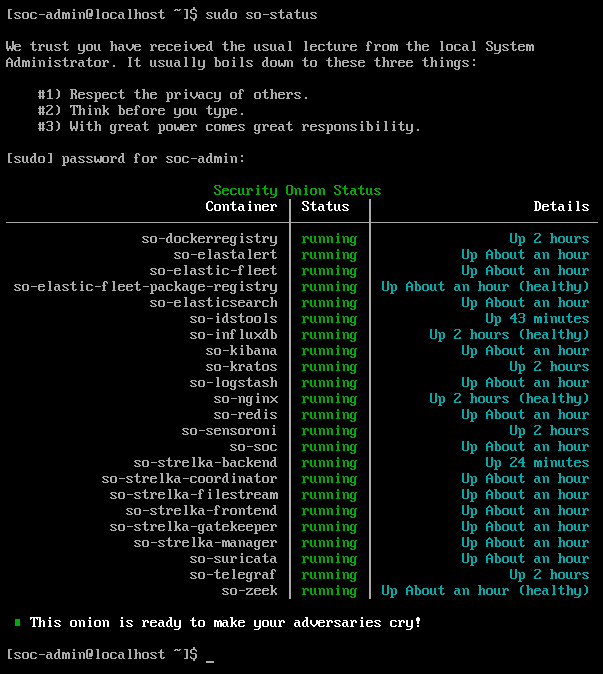
You are now interacting with Security Onion. Run the command
sudo so-status
and enter your password.
Here you will see docker containers running the Tech Stack mentioned above.
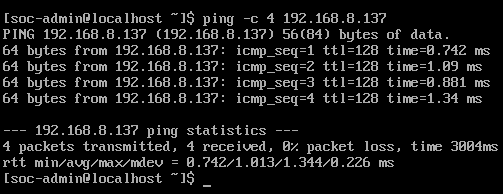
To test the connection, ping the Security Onion VM from another system.
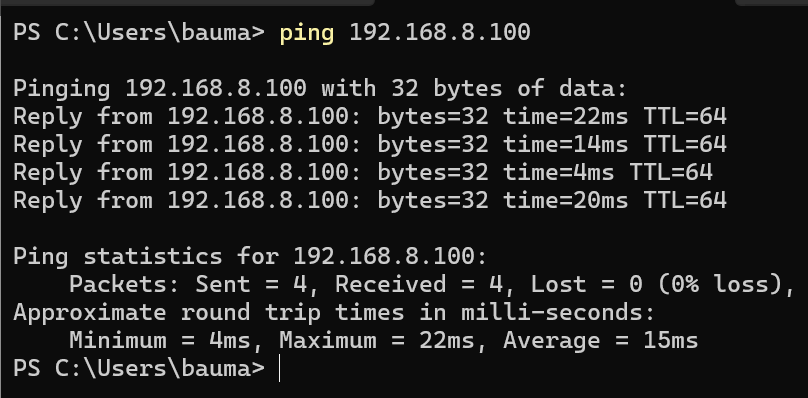
Now ping the other system from Security Onion command line.
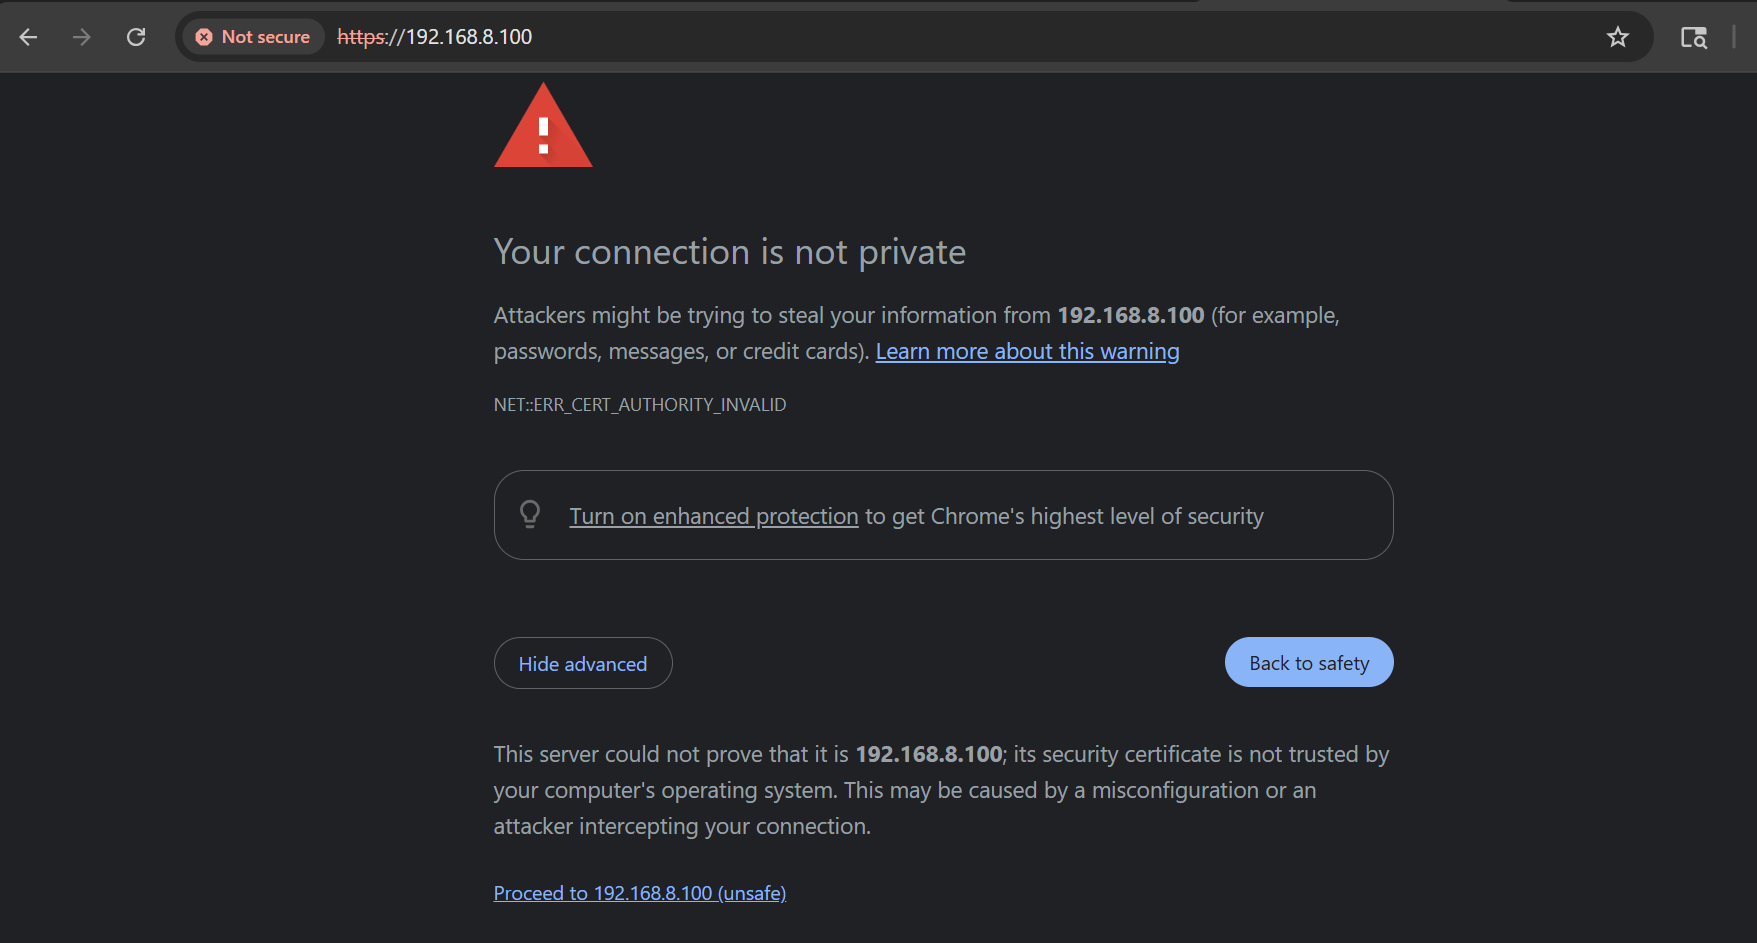
On your other machine, using either Firefox or Chrome go to the SOC web interface by typing the IP address into the address bar.

This warning will pop up. That’s ok go ahead and proceed.
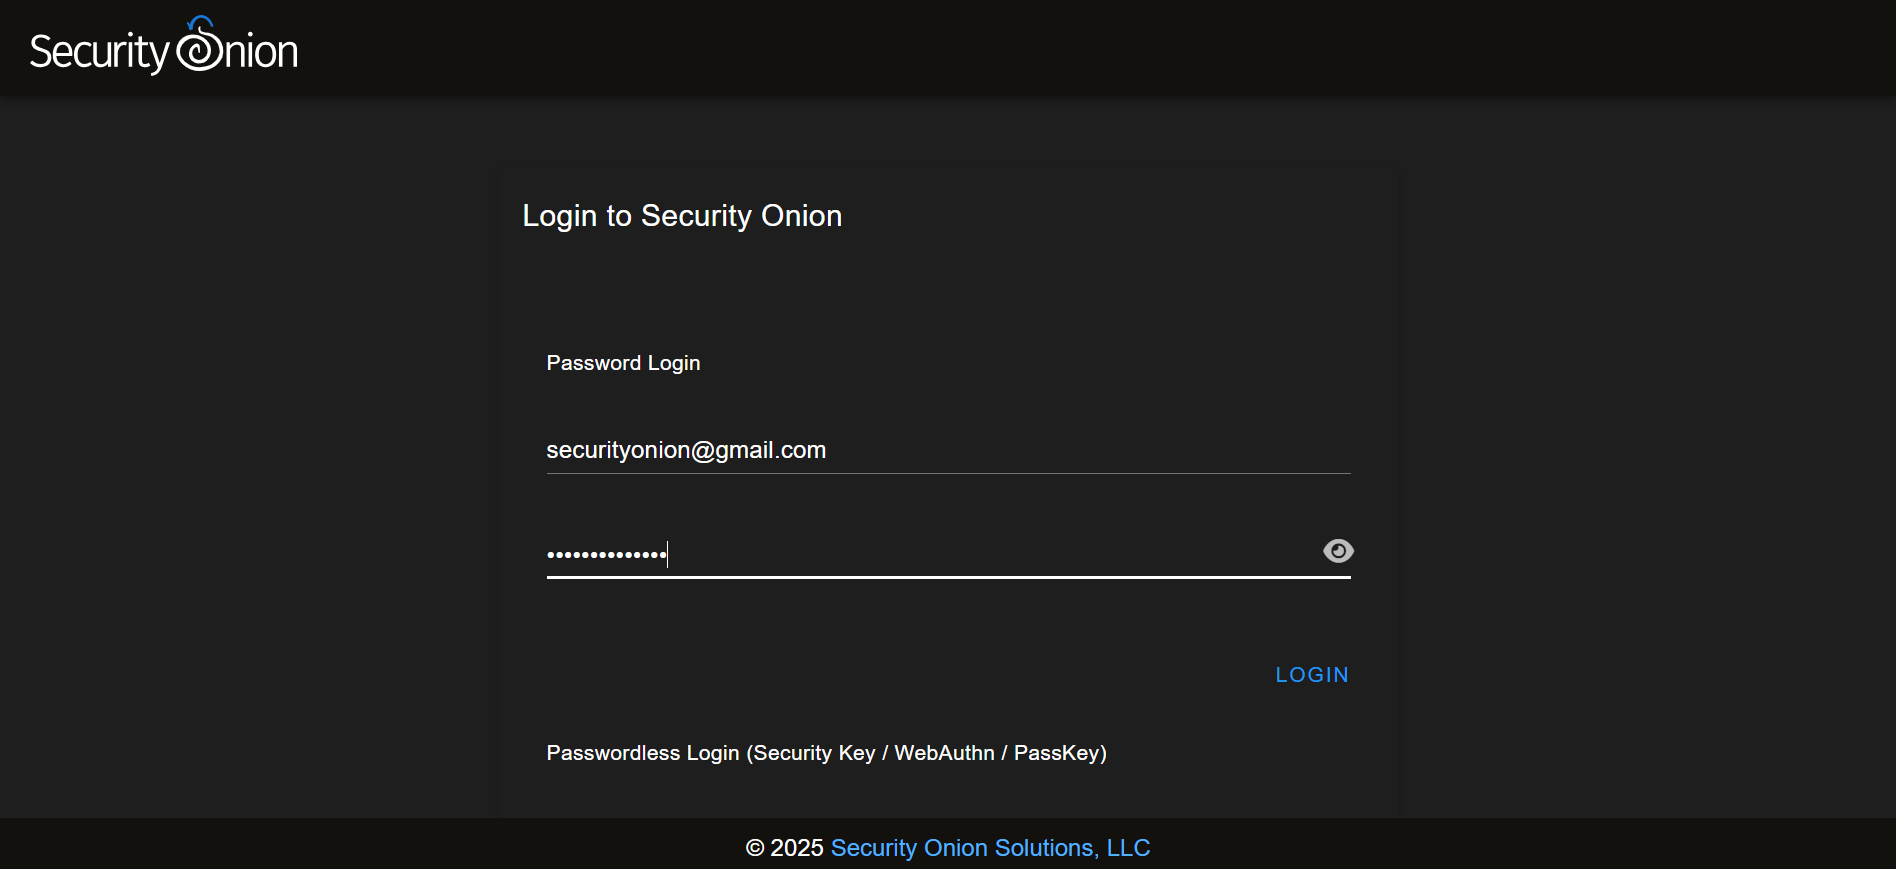
Sign in using the created email and password.
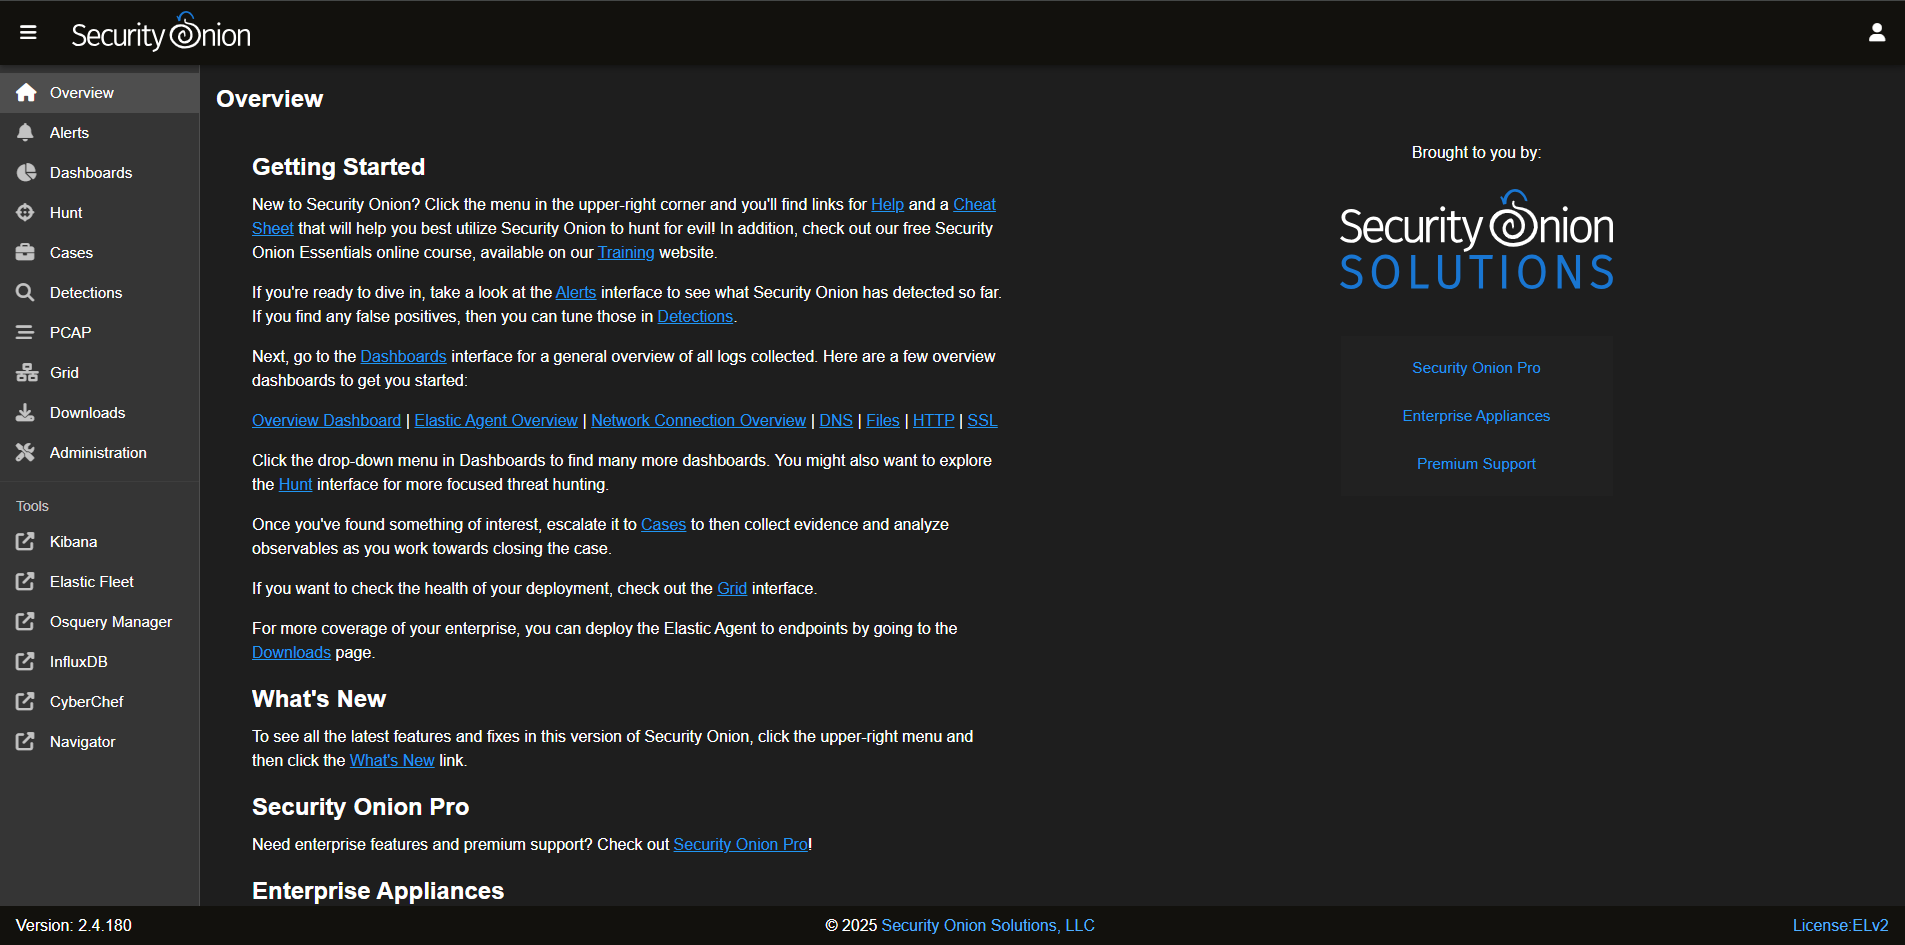
Congrats you have successfully installed and configured a Security Onion Home Lab.
Part 2 to follow